


A level is one of the most important tools in any builder’s or DIY enthusiast’s toolkit. Whether you’re hanging a picture frame, installing shelves, or building a deck, a level ensures that everything is perfectly aligned. But do you know how to use a level to its full potential? In this article, we’ll walk you through what a level is, the different types available, and how to use one effectively to get precise results every time. By the end, you’ll be able to use a level like a pro!
What Is a Level?
A level, also known as a spirit level or bubble level, is a tool designed to indicate whether a surface is perfectly horizontal (level) or vertical (plumb). The traditional level consists of a sealed tube or vial filled with liquid and an air bubble. The vial is usually slightly curved, allowing the bubble to move freely. When the bubble settles between two lines, the surface is perfectly level or plumb.
Modern levels are available in various sizes and designs, some with additional features like laser guides for more advanced applications. However, at its core, the level remains a simple, yet essential, tool for ensuring accuracy in all kinds of projects.
Types of Levels
Carpenter’s Level
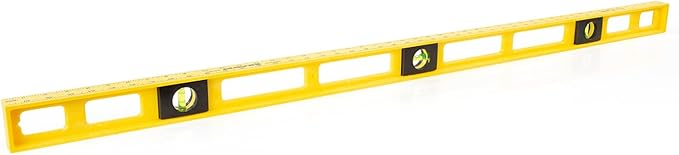
A carpenter’s level is the most common type. It typically has two or more vials: one for horizontal measurements (level) and one for vertical measurements (plumb). These levels come in various lengths, from small pocket versions to longer models that are used for larger projects like framing walls or installing cabinets.
Torpedo Level
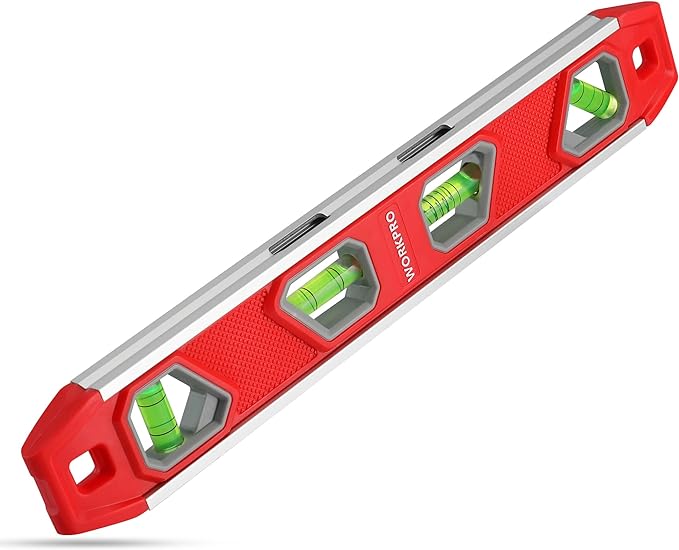
A torpedo level is a smaller, more compact version of a carpenter’s level, usually about 6-12 inches long. It’s great for smaller jobs, tight spaces, or situations where a full-sized level isn’t practical. It often has an additional vial for 45-degree angles, making it useful for measuring slopes.
Laser Level
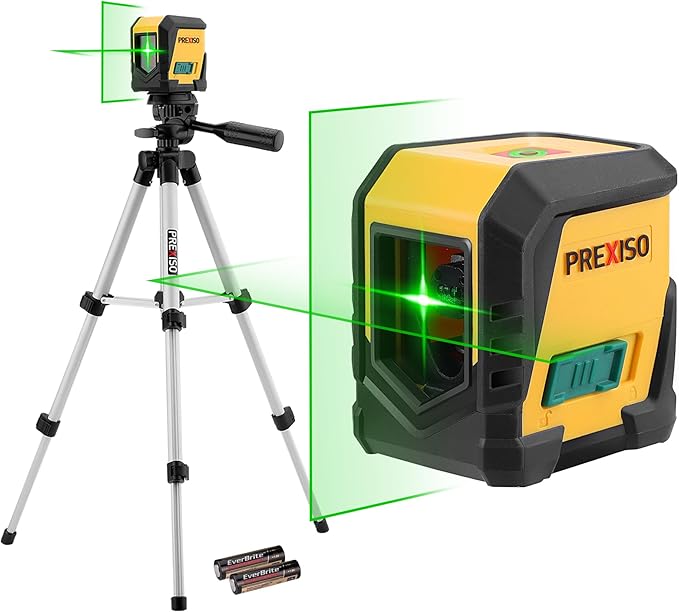
Laser levels project a straight line across a surface, offering precision over long distances. These levels are ideal for larger-scale projects such as installing tile or laying out a room’s dimensions. The laser ensures you maintain accuracy over large areas without needing to reposition the tool frequently.
Post Level
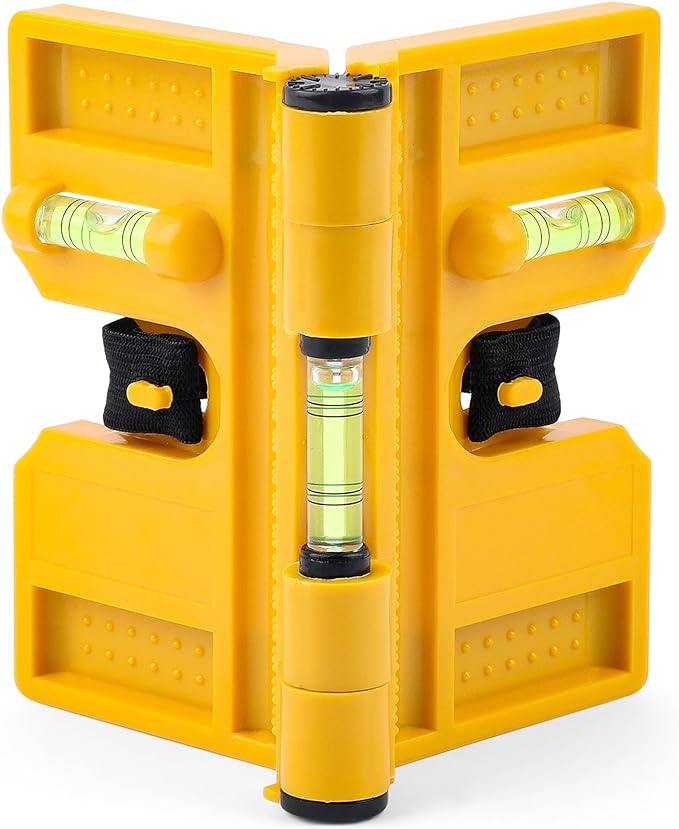
A post level is specially designed for checking the plumb and level of vertical posts or poles. It is used by placing it on the corner of a post, where it will simultaneously measure both horizontal and vertical planes, making it a go-to tool for fence building or installing vertical supports.
How to Use a Level
Now that you’re familiar with the different types of levels, let’s go over how to use them properly for accurate results.
Checking Horizontal Level
To check if a surface is perfectly horizontal, place your level on the surface you’re measuring. If you’re using a carpenter’s or torpedo level, look at the horizontal vial. The bubble will naturally move based on the angle of the surface. Adjust the surface until the bubble is centered between the two lines.
For tasks like hanging pictures or mounting shelves, place the level across the surface to ensure it is perfectly straight. If the bubble is off-center, you’ll know which side needs to be raised or lowered.
Checking Vertical Plumb
Using a level to check vertical alignment is just as simple. Hold the level against the surface you want to check for plumb, such as a wall or post. Check the vertical vial and adjust the surface until the bubble is centered.
For projects like installing door frames or ensuring walls are straight, achieving perfect plumb is critical for long-term stability and appearance.
Using a Level for Angles
Some levels, like torpedo levels, come with an angled vial to help you measure 45-degree angles. This feature is particularly helpful for projects that require slope or incline measurements, such as building a ramp or a staircase. Simply place the level on the angled surface and adjust until the bubble is centered in the angled vial.
For precise angles, a laser level is your best bet. Set it up to project a straight line across the area you’re working in, allowing you to maintain a consistent angle over long distances.
Tips for Using a Level Like a Pro
Using a level seems simple, but there are a few tricks and best practices to ensure you get the most accurate results every time.
Keep Your Level Clean
Dirt, dust, or debris on the surface of your level can affect its accuracy. Make it a habit to wipe your level clean before and after each use, especially if you’ve been working in a dusty environment like a construction site.
Check Both Directions
When checking for level or plumb, always measure in more than one direction. For example, when leveling a surface, check from both the front and side. This ensures that the entire surface is evenly level, not just one part of it.
Use Shims for Adjustments
If your level reveals that a surface is slightly off, use shims or wedges to make fine adjustments. For instance, when installing a shelf, you might place a thin shim under one end to bring it into perfect alignment. Keep a variety of shim sizes handy to help you make small corrections as needed.
Ensure Proper Positioning
For long surfaces, move your level along different points to check for consistent accuracy. A surface that’s level in one spot may not be level in another, especially if the material warps or sags. By moving your level along the surface, you ensure that the entire area is straight and even.
Use a Laser Level for Large Projects
For projects that span a long distance, like laying out a deck or installing a long row of cabinets, a laser level provides unmatched precision. Laser levels project a line across the surface, making it easy to maintain level or plumb alignment across a large area without having to manually reposition the tool.
Mark Your Work Area
As you work, make small marks on your surface to keep track of areas that you’ve already leveled. This is especially helpful for large-scale projects or when installing multiple fixtures in a row. It helps you maintain consistency and avoid repeating steps.
Common Projects That Require a Level
Here are some common tasks where a level is essential:
- Hanging Picture Frames: Ensuring the frame is level is key to an attractive display.
- Installing Shelves: A level shelf is not only visually pleasing but also functional, ensuring items don’t slide off.
- Building Fences: Properly leveled fence posts are essential for long-term stability and a professional appearance.
- Tiling: Whether it’s a floor, wall, or backsplash, tiles need to be perfectly level to prevent uneven surfaces.
- Framing Walls: When framing walls or doorways, ensuring that everything is plumb and level is crucial for structural integrity.
What to Avoid When Using a Level
Even though using a level is straightforward, there are a few common mistakes to avoid:
- Not Checking the Vial Properly: Make sure you’re reading the vial correctly. If the bubble isn’t centered between the two lines, the surface is not level.
- Using a Damaged Level: A bent or warped level will give you inaccurate readings. Always check your level for damage before using it.
- Relying on the Level for Long-Distance Projects: While traditional levels are great for short spans, projects that span a long distance (like flooring or cabinetry) may benefit more from a laser level to ensure consistent accuracy.
A level is a simple yet powerful tool that ensures your projects are aligned, balanced, and safe. Whether you’re a professional builder or a DIY enthusiast, learning how to use a level correctly will improve the quality of your work. From hanging shelves to building fences, using a level ensures everything is straight and true. With the tips and techniques outlined in this guide, you’ll be able to use a level like a pro in no time!
Now that you know how to make things straight, let’s go over some of the saws you will want to have on hand for your DIY projects.


